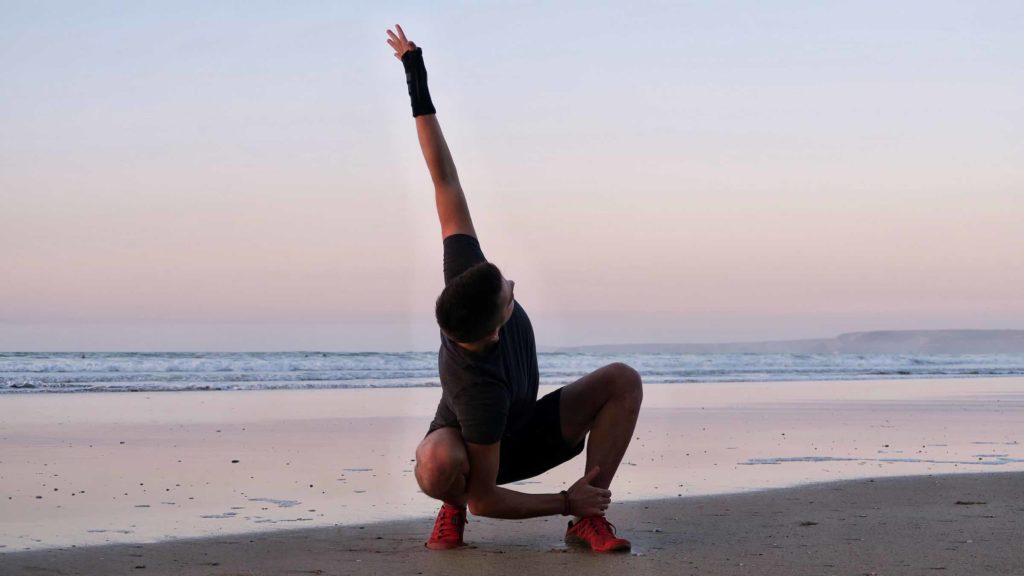
We can think of mobility as the perfect marriage between flexibility and strength. This ability to control our joints and limbs as they move through a full range of motion is one of the foundation stones for both performance and longevity in any sport - especially one where you’re attempting to maintain your balance in amongst the swell...
The truth is if you’re unable to get into safe positions on the board due to mobility restrictions or imbalances, not only does your risk of pesky injuries goes up, but your performance in the water can suffer as your progress stalls.
The great news is that the opposite is also true. Just 10-15 minutes a day spent on specific stretches, release exercises and stability drills can do wonders for your mobility and overall surf game - now and long into the future. Fewer injuries, more time in the water, faster skill development and a lengthier surf career - all sounds good to me!
Let’s dive into five of my favourites.
Ah, the thoracic spine… This area of the mid-back (and the surrounding ribcage) is a common sticking point for many a surfer, particularly beginners and intermediate riders. Sitting for hours in the van, hunching over iPhones and general 21st-century life can create a whole load of stiffness.
When we’re then trying to paddle out past the break, that tighness makes it harder to extend through the T-spine and get into an effective, upright paddling position. This places excess strain on the neck as it cranes up. It also restricts the shoulder blades and limits your ability to reach out overhead (which can potentially lead to some funky shoulder issues).
Here’s how to fix all that:
Position 1: With your arms across your chest, spend 20-30 seconds gently rocking your body from side to side to free up tension on either side of the spine.
Position 2: Arch over the roller and reach your arms up overhead, keeping them as close to your ears as possible. Keep the core slightly engaged to prevent the ribs from flaring. Return back to the hands across the chest, and repeat the overhead reach for 10-15 reps.
The lunge and twist is one of my all-time favourite surf-specific mobility exercises for a whole host of reasons.
First up, it addresses one of the most common complaints and postural issues we see in surfers - lower back pain. When you combine the slight bend at the hips in a surf stance with a bunch of sitting out of the water, the hip flexors get chronically tight, rotating the pelvis and causing stiffness in the old lumbar spine. The lunge is one of the best ways to open those bad boys up.
The twist is the icing on the cake, wringing out spinal tension like a sponge. That mid-back we touched on above is often limited in rotation, as is the neck. This makes it harder to turn your board efficiently and execute those sick cutbacks. The result is that the lower back often takes up the slack, which can again result in issues.
Here’s how to do a lunge twist:
Paddling out past the break or to catch your wave requires a good degree of shoulder mobility, particularly internal rotation (and a degree of external rotation too). If you stretch your arms out to your side with the palms facing forwards and a 90-degree bend in the elbows, internal rotation sends the palms towards the floor, whereas external is the opposite.
If you’re unable to fully internally rotate, the shoulder is in a much less stable position when you paddle, resulting in a less efficient technique. Simply put, paddling becomes more effort than it needs to be, and it’s harder to catch waves. On top of that, those thousands of strokes in a sketchy position add up and can potentially result in shoulder impingement and rotator cuff injuries.
Here’s how to improve your paddle efficiency:
When we’re able to move freely through the hips, pretty much every physical activity we do becomes easier, less restricted, and subsequently more enjoyable.
Mobile hips mean a faster, smoother popup on your board - essential for timing your wave properly. The squat sequence we’re going to explore below (inspired by Ido Portal) can also help with knee stability, ankle health, and even more thoracic rotation. All key attributes are needed for maintaining balance and keeping control over your stick, whilst reducing your risk of getting hurt.
Here’s how to do it:
Position 1: We’re going to start by freeing things up, internally and externally rotating at the hips. Support your upper body with your hands or elbows on the floor behind you. Staying on the balls of your feet, slowly externally rotate your left leg to end range (moving the knee away from the body), followed by internal rotation (left knee towards the right). Perform 15-20 reps, then repeat on your right.
Position 2: With your core switched on, lower into a deep squat. Ideally, we’re looking for the heels flat, arches lifted, feet screwed into the floor (facing forwards or turned slightly out), and the spine nice and long. We’re all different, so if you need to turn your feet out, hold onto a wall or put some blocks or bricks under your heels to get comfortable for now, that’s cool! Find a position you can rest in for 60-90 seconds. With your hands on the floor, slowly start to shift your weight around, exploring tight spots and loosening things up.
Position 3: If you’re struggling with Position 2, that’s no problem. Stay there for now, or take this one super gently. In the deep squat, we’re going to grasp the right shin with the left hand, then staying tall, rotate the upper body rightwards towards the sky. Like we did in the lunge twist, initiate it through the core, mid-back, then neck if comfortable, and finally reach overhead with the right arm. Return to center, repeat for 15-20 reps, then do the same on the opposite side.
It’s no secret that your knees take a bit of a battering if you surf on the regular. There's a ton of force at play when you're turning, particularly on the back leg (which is prone to collapsing inwards and causing all sorts of trouble).
When done regularly, the hip sequence above is a great way to protect your knees from injury. Freeing up the hips allows you to externally and internally rotate without restrictions, meaning your knees don't take the brunt of it when you smash that bottom turn.
The balance drill below is another great one to add to your arsenal though, as it can really help with both knee and ankle stability.
Position 1: Stand tall with your bum clenched and your core tight. Find a fixed point on the horizon and gradually lift your left leg off the floor, bringing your knee past ninety if possible. If this is a challenge, lower the leg slightly and over time try to build up to 60 seconds of balancing.
Position 2: Keeping your core on, you’re going to slowly reach your left leg out to the different points of a compass, very gently touching down or near to the floor. Allow your standing leg to bend as necessary, but focus your efforts on preventing the ankle and knee from collapsing inward.
Hit North in front of you, North West, West, and all the way around the back of your body to North East (which should be a challenge). The closer to your body the point of contact with the floor, the easier it is, so try to widen your circle as much as possible. Repeat for 3-5 circles (forwards and back is one), then swap sides.
How can you structure all of this onto your training?
Like many things in life, with mobility, there’s no one-size-fits-all approach. The most important thing is to find a schedule that works for you. That might mean 10-15 minutes of the above every morning before work. It might be a case of including the drills into your pre-surf warmup, or into any home training or gym work you like doing.
However, you choose to incorporate your mobility work, remember that it’s consistency that counts. By committing to the process on a daily or near-daily basis, over time you’ll start to see tangible improvements in both your surfing and everyday physical activities.
Luke is a movement coach, click here to check out his online coaching series.
There was a problem reporting this post.
Please confirm you want to block this member.
You will no longer be able to:
Please allow a few minutes for this process to complete.